This article is part three of four in our series about the effect that website speed has on SEO for dental websites. In the first post, I discussed website speed and the link to SEO, and in the second post I discussed the effect your web host has on website speed. In the second post I also touched upon some tools you can use to help evaluate your website’s speed. Here in this third post in the series I’m going to talk about common website content issues that can affect the speed of your site. You will find that fixing these “small” things individually can add up to have a significant overall effect on your site’s loading time (and therefore your site’s SEO, and by extension your entire user experience).
When most people view a website the look at the content on the page and tend not to focus on all of the items that have to load in order for a website to appear in a browser window. I’m sure you’ve had the experience where you have to wait for a website to load, and while the text appears quickly, the images and other features tend to take time to appear on the screen.
Our goal with website content is to provide the best-looking content (resolution, colors, etc.) but with the minimum file sizes. Remember that your web page is made up of tens (and sometimes hundreds) of small “puzzle pieces” (files), that all have to load to make your website appear in a browser. So naturally it makes sense that we want to have the smallest possible file sizes so our website loads quickly, but still looks good. You can think of the ALARA principle for dental radiography as an analogy – we have to take films – but we can do it in a way that gives us excellent diagnostic data while still maintaining the highest level of patient safety.
So let’s take a look at two key players that have an effect on your website load time, and how they can be adjusted to “play better” (i.e. load faster).
Images and graphics are of course a critical aspect of any website experience, and it would be a huge mistake to remove images to save load time. However, it’s also a huge mistake to have images on a web page that aren’t optimized for the web (and yes this includes tablets and smartphones as well). When you take a picture on your DSLR camera, or even on your iPhone, that image can be upwards of around 1MB (and usually more). Considering that you have at least 16GB of storage space on your iPhone, a 1MB picture does not put a dent in your storage capacity. But putting this 1MB in perspective, 1MB is about the size of many ENTIRE web pages. So if you had a 1MB image, there’s no way your website could “come in” at under 1MB. And as I said above, the size of the web page makes a huge difference because the larger the files are that the browser has to load, the longer your web page will take to load.
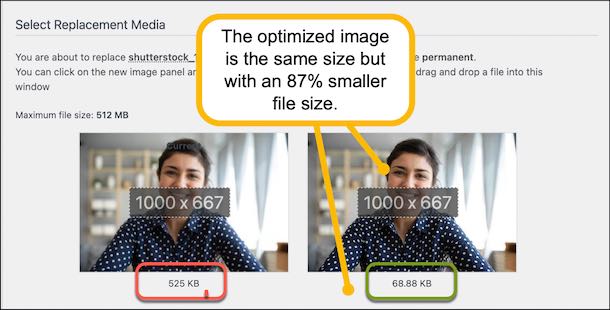
Consequently, you want to optimize your images, and while I’ll leave the explicit details of how to do this to your web development team, you should understand the concept. Let’s take that 1MB photo from the paragraph above. You could probably use a 1MB photo to print out a 4x6 picture at a nice resolution (I don’t want to get into resolution here as it’s beyond the scope of this article) -- but do you need that level of quality for your website – where you are going to be showing the image in a relatively small area? Of course not! So in optimizing an image, we shrink the file size of the image down as much as we can – but while still preserving the quality of the image. Naturally you would not use this optimized image to print a 4x6 or to use on a postcard, but for the specific purpose of displaying it on a web page – a smaller file size (with less data) is perfectly fine and still looks good. So if we are able to take that 1MB image and optimize it to 50KB (that’s a 95% reduction) and still have it look good – imagine the load time you will save! And that’s exactly the point!
We just saw how optimizing page-specific images can save a significant amount of page loading time and hence increase page speed. But it’s critical not to overlook global images, or images that are on every page such as your logo. If the logo on your website had a 1MB file size, you’d be adding 1MB of data to EVERY page on your website (recall that a web page should come in at about 1.5MB TOTAL at the most – with some exceptions). Now if you reduced that logo by 95% to 50KB, you’d save 950KB on every single page on the site, and your entire site will load much more quickly – all from one small change,
In the following real-life example, we took on a client with an existing website where the existing company's approach to the website's image was - in our opinion - incredibly poorly done. For privacy we've blocked out the name of the website and the web provider.
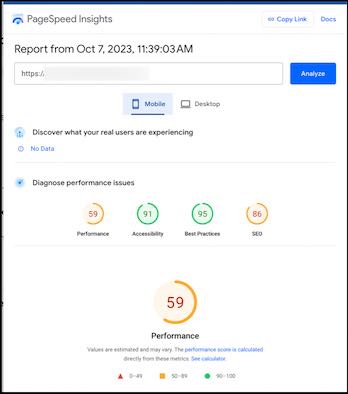
An initial look at Google's Page Speed insights showed very poor performance at 59%:
We noticed that a few of the image files were very large so we ran a crawl which revealed that most of the site's images had incredibly large file sizes, and should never have been posted to a live site like this. One of the many checks that we do when we build and launch websites is to make sure that image sizes are balanced -- small enough to load quickly, but large enough to display crisply.
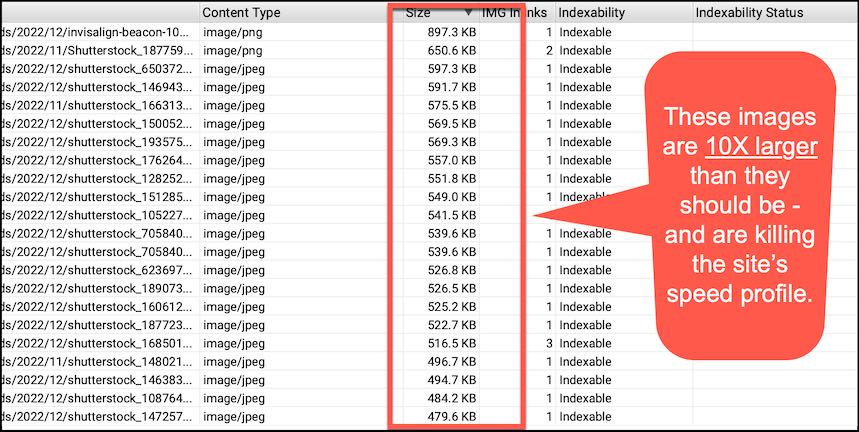
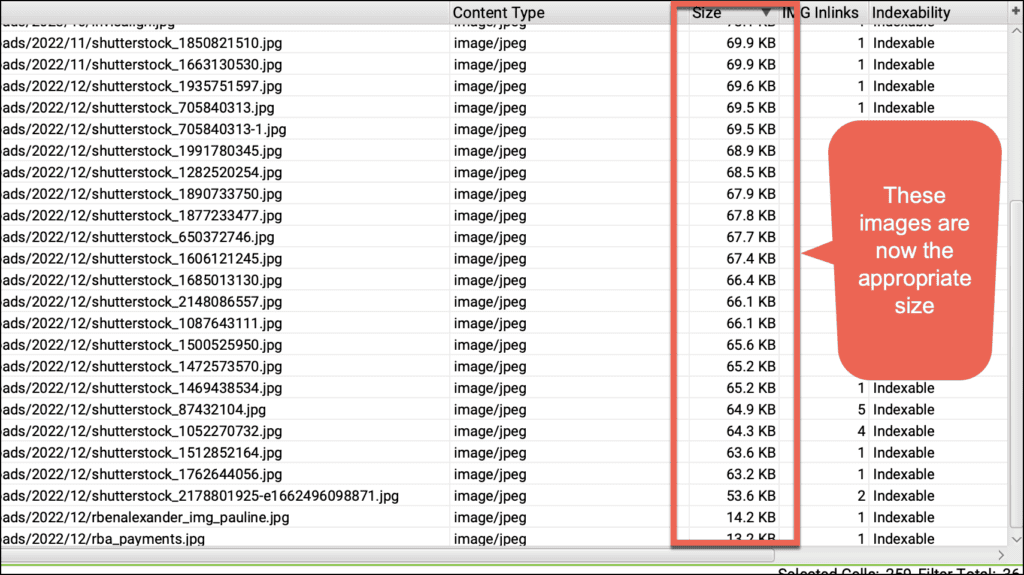
So we downloaded all of the large images and optimized them for the web, and re-uploaded them to the website:
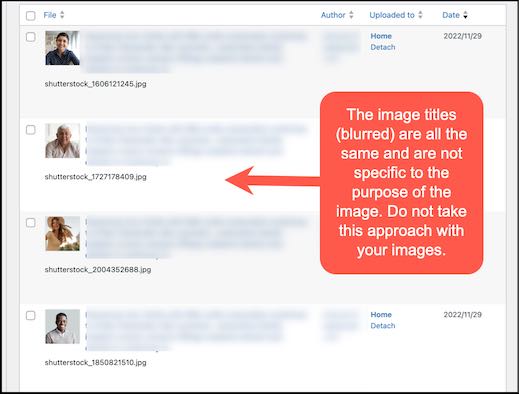
While we were under the hood we saw that many images had the same image titles (a bad idea for SEO) but were long sentences that weren't relevant to the subject of the image/page.
Looking at one image in particular we saw a number of key problems.

Individually these issues may not have been a big problem here or there. However, the fact that multiple issues were present for the same image can collectively hurt the page's rankings. Add the fact that these same issues were repeated on many images across the site, and you have a recipe for a poorly performing website.
In this example below the image title wasn't changed - a key oversight that can potentially hurt your rankings.

The most frustrating part of this entire situation was that these were issues that are easily fixable.
And fix them we did:
Summary
The take home message here is that many interconnected parts have to come together to display your website on the users screen, and our goal is to make sure that the users gets the best experience – with the smallest file sizes. So that means making sure that your individual images load quickly (such as the smiling teeth on your whitening page), and also realizing that global items such as your logo and social media icon images files that while small individually, can add up to really slow down a website. Other items do play into the loading time such as scripts and other data, but the first (and baseline) step is making sure that images are the smallest sizes possible but while still maintaining their “good looks”.
As always, please let me know if you have questions!