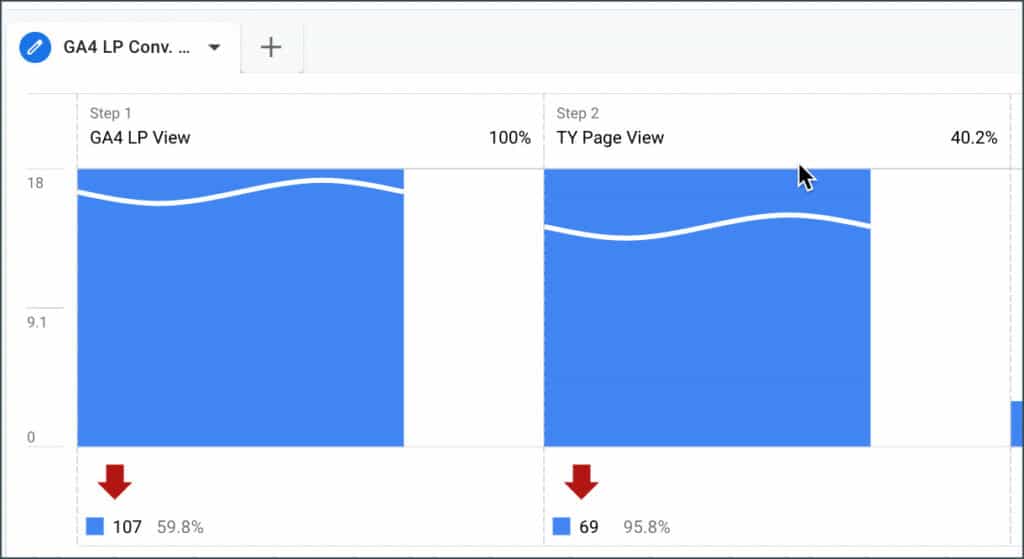
If you're like me, you probably have a number of landing pages and thank you pages, and you use the "thank you" page visits to track conversions and the conversion rates on your forms. In this tutorial we're going to setup a Google Analytics 4 funnel report so we can track:
So before we start, make sure that you have the URL of your landing page (e.g your form) and the URL of your thank you page (the page people are redirected to after they submit your form).
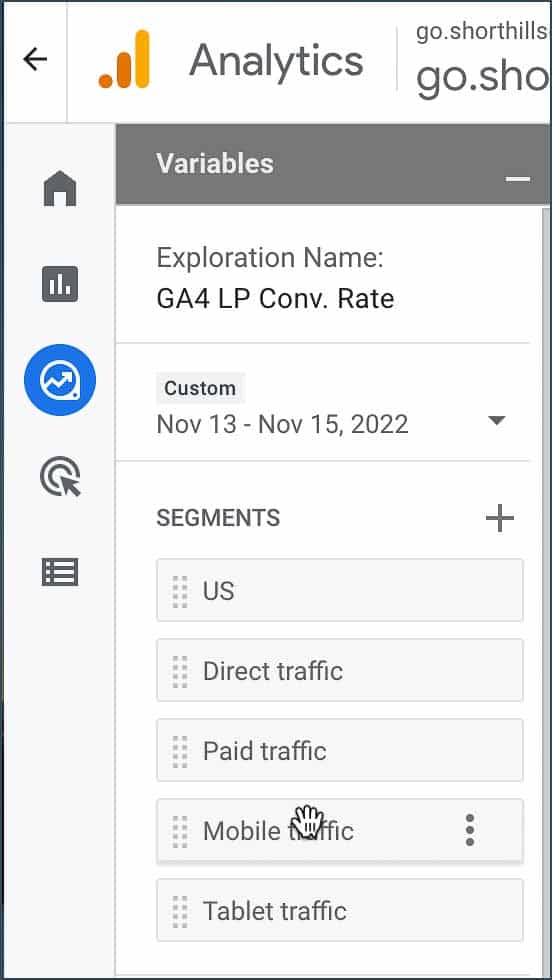
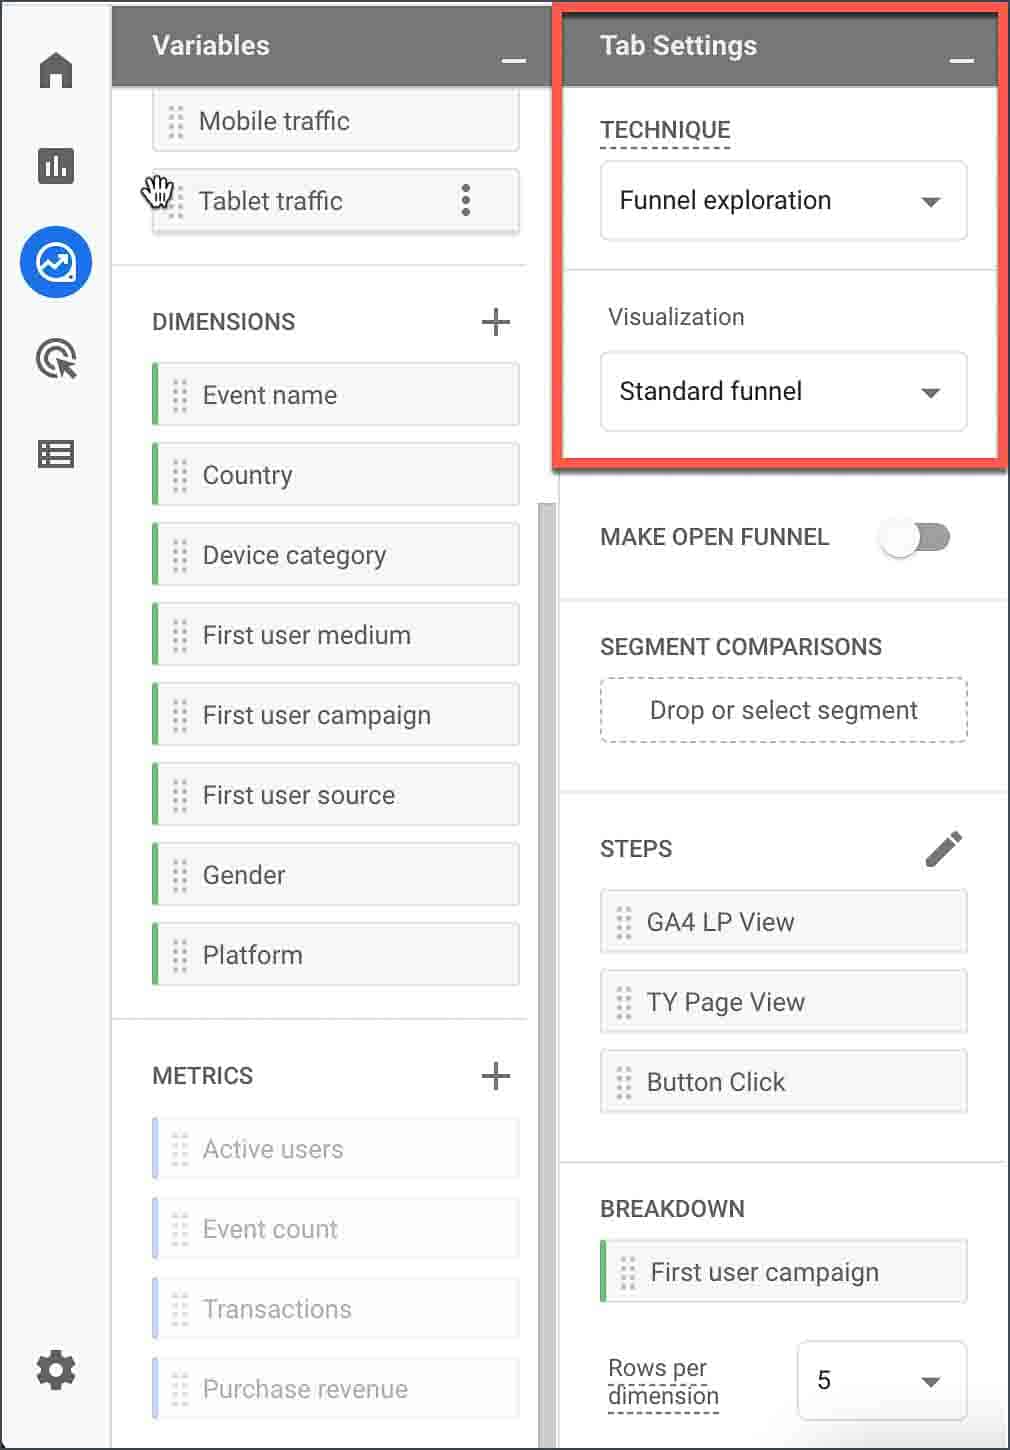
We'll start our journey by navigating to the Explore section in the left column in GA4 and then selecting Funnel Exploration as the way we're going to explore the data.

Now let's start configuring the data we're going to show in our report. The first thing we can do is to select a segment. In this example I'm leaving it blank to include all traffic, but you might find it useful to add a segment to learn more about your data (e.g. via country, via traffic source, or even if the visitors are purchasers or not).
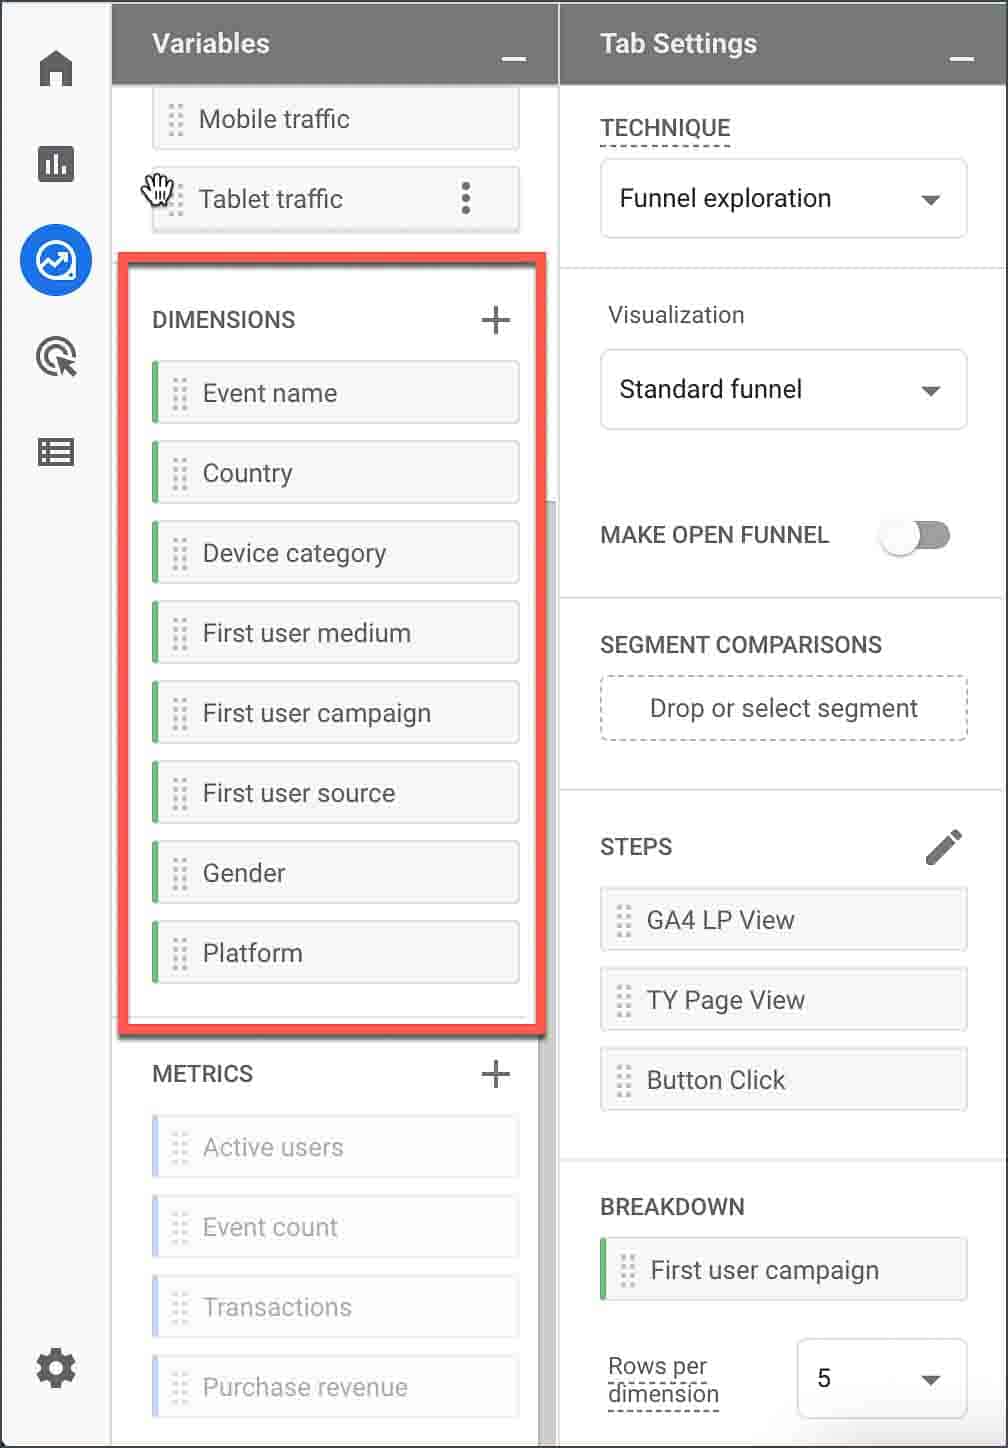
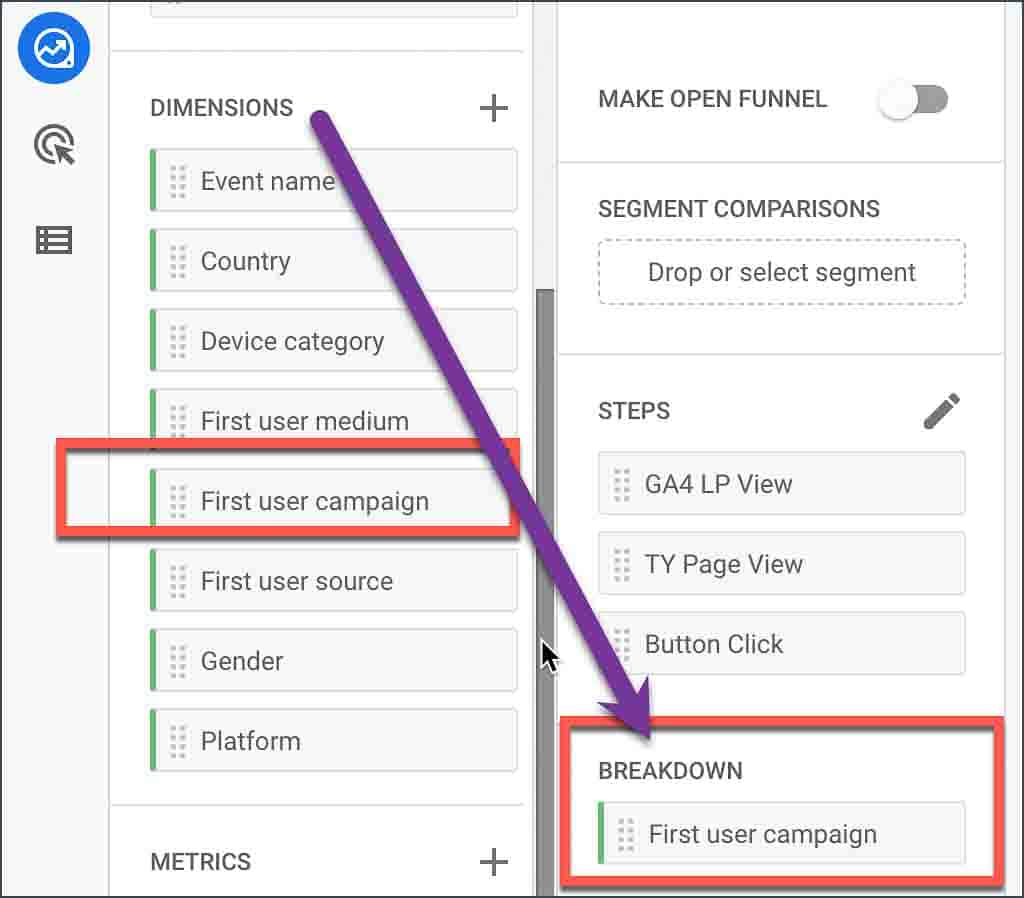
With your segment selected (or not selected so you can include all traffic), let's pick the dimensions we're going to use. You can think of dimensions as WHAT and metrics as HOW MANY. So in this case I want to look at events (our landing page visits and our thank you page visits), and I'm going to want to look at the other dimensions you see included below. To include a dimension in your report just click the + sign and add the dimension you'd like. Remember that these dimensions won't come across automatically to your report -- rather you'll need to drag them over to the appropriate section under "Tab Settings" (which we'll look at below).
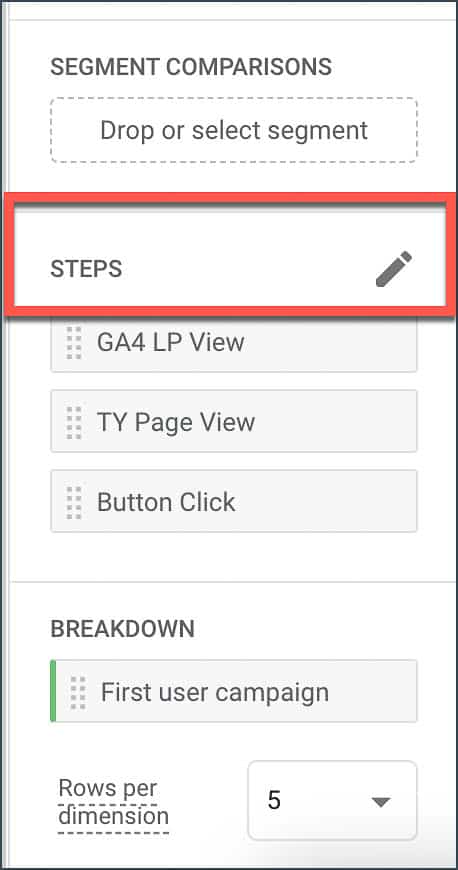

(Note that before you can add a metric to the Breakdown area, you need to add it on the Variables side under Metrics. As you can see in my screenshot I have a few other metrics selected which gives us a different view of our data (i.e the source/medium is helpful as well) for knowing which sources/mediums convert better than others).
In this post we talked about setting up a funnel report in Google Analytics 4. Armed with this data, you can now start to design strategies and A/B tests to improve your CTR and increase your conversions.